Setup The Store URL In The Web-Based Admin System
After activating your copy of Site Store Pro and setting up the Master Administrator account, you will be redirected into the web-based admin system.
It is highly recommended that you setup the Store URL and Checkout URL settings at this point.
The Store URL and Checkout URL are used by the Site Store Pro application for resource (content) lookups as well as the location of your shared or dedicated SSL checkout URL. (if applicable).
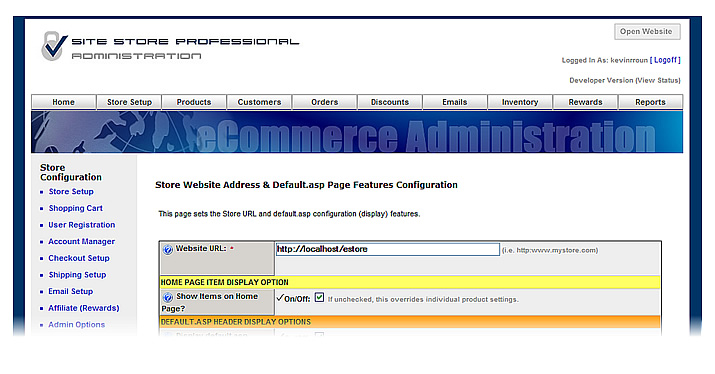
To access the Store Setup area, click on the ‘Store Setup’ button on the top menu bar, then on the link that reads: ‘Store URL (Website Address) & Default Page Configuration’ to display the screen below:

Enter the domain name or IP address where you installed the Site Store Pro files in the field labeled ‘Website URL’. Do NOT include a trailing forward slash (/) when entering the URL of your store.
For example, if the Site Store Pro files were copied to https://www.123abc456.com/ you would enter https://www.123abc456.com
If you copied the files to a subdirectory on your webserver, do not forget to include the subdirectory in the URL. For example, if you copied the files to a subdirectory called ‘teststore’ on the webserver located at 192.168.1.101, you would enter https://192.168.1.101/teststore as the Website URL.
When you have finishing entering the Website URL, click on the ‘Update Configuration’ Page to save the URL in the system.
Category:
Setting Up Your Online Store

